How To Use Reverb - The Basics
How To Use Reverb - The Basics
Reverb. It’s a tool no producer can live without, but it sure as hell can give you a headache or two. Reverb is incredibly hard to master as there are a lot of things that you have to keep in mind. In ‘How To Use Reverb - The Basics’, we’re going to tell you all about the basics of reverb, what it does and how it should be used.
What Is Reverb?
Reverb is short for reverberation. A lot of people seem to think that it is the same thing as an echo (or delay), but this is not the case. While both refer to the way sound waves bounce off of various surfaces before making their way to your ears, reverb is different from echo or delay in the sense that it is actually made up of a huge amount of tiny echoes, all occurring within 30 milliseconds after the original sound wave. Because of this, it is more like a smear of sound instead of a distinct pattern of repetitions.
What Does Reverb Do?
Firstly, it is worth noting that a record without reverb sounds unnatural. If you have ever been in a room where no natural reverb is present, you’ll know what we mean. Everything seems off. This is because there’s reverb all around us in the real world. We just aren’t consciously aware of it.
Yes, there’s a point to all this. Without reverb, our ears can’t determine how big the room is we’re in or how far away we are from the source of the sound, whether that’s the speakers near the DJ booth or the band on stage. If you use no reverb at all in your record, it will not only sound off and unnatural, but also flat and depthless.
In addition to its use as a tool to create depth, reverb can also be used as an effect to create or enhance a certain atmosphere. This is especially the case in music genres such as Trance or Ambient, where long and heavy reverbs are much more common.
How Should I Use Reverb?
You use reverb when you want to create a sense of space (or depth) in your song. By applying more, you can push certain elements or sounds to the background. The opposite applies as well. If you put a lot of reverb on all sounds but one, that one sound will have a more prominent place in the mix. There are a lot of different settings that define how your reverb will sound. Below, we’ll explain what the most common parameters do. The rest may be dealt with at a later stage through a more advanced version of this article.
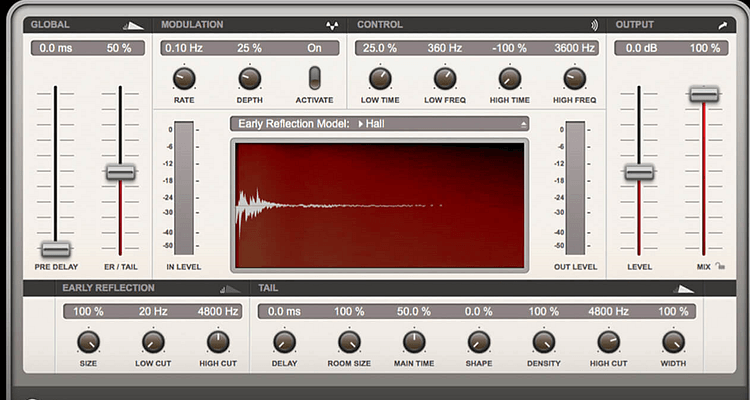
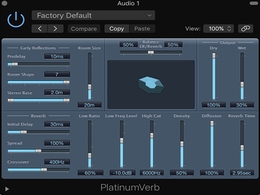
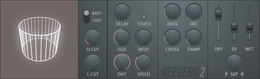
Reverb Types
Although there are many different reverb types, most of them can be divided into five main categories: Room, Hall, Chamber, Plate and Spring. The first three, (Room, Hall, Chamber) speak for themselves, as they all refer to the size of a space. A Room reverb tends to give off a sense of a small space (much like a room), whereas a Hall reverb is often long and big, like the one you’d hear when shouting in an empty cathedral. The example given is a bit of an exaggeration, but we’re sure you understand what we’re getting at. Chamber can be either big or small, but despite sharing a lot of traits with Room, it doesn’t have as much early reflections.
The Plate and Spring reverbs are a bit different. They don’t sound as natural as the other three, but that’s because they aren’t intended to sound that way. Instead of giving a (natural) sense of space, Plate and Spring reverbs are used to add character to a sound. A Plate reverb is an electro-mechanical plate that vibrates with the music. Its sound is dense, has a lot of early reflections and is often used on vocals to give it a bit of extra character. It also works well on drums, particularly on snares.
Spring reverb is also a man-made reverb and mostly used on guitars. It also works well on woodwinds and vocals, especially if you’re aiming for a ’60s vibe.
Pre-Delay
Pre-Delay translates to the time it takes before you hear the first (early) reflections of the sound. When you set a higher (or longer) Pre-Delay, it takes longer for those reflections to pop up. This will give you the idea that the sound is played in a big hall. When you’re not trying to create a sense of space (with Plate and Spring reverbs for example), the pre-delay is much shorter or even non-existent.
Early Reflections or Size
Often referred to as Size, Early Reflections are the first bounce-backs of the original sound. Our ears use these bounce-backs to determine how large the space is we’re in. If they occur (almost) instantaneously, the room we’re in is pretty darn tiny. If it takes longer for us to hear the early reflections, chances are the space we’re in is considerably larger.
Density
Density regulates how dense the reverb is. In other words, how much (or how little) space there is between the early reflections themselves. At a higher density, the sound of the reverb is thicker. With a lower density, it sounds more natural.
Decay
Decay determines how long it takes for the reverb to die away. This is why you often see it labeled as Reverb Time. The trick with Decay is to set the time so that it just stops being audible when the sound hits again. If the reverb starts overlapping the next tone, you should consider decreasing the Decay. Otherwise, the sound (and possibly the entire mix) could become muddy and messy.
What Are The Pitfalls Of Using Reverb?
You may inclined to use a lot of reverb all the time, but we would like to advise against it. As with pretty much all things in life, you have to use it in moderation and with restraint.
Let’s emphasize on the “with restraint” part. Although reverb can work wonders for the atmosphere and fullness of your record, it can also destroy your mix if used incorrectly. Too much reverb (or excessive reverb times) will clog up your mix, and the individual sounds (or tones) will not sound as clear as before (or even get drowned out entirely). Instead, screw up the level of reverb until you think it’s good and then tone it down a few notches. That’s a great rule of thumb to go. Less is more.
In the end, the right use (and right amount) of reverb can glue your mix together and add that much-needed depth and sense of space.
You now know how to use reverb and which mistakes to avoid. If you want to learn more about reverb or music production in general, you may want to check out our music production masterclasses at Armada University.
You’ll learn the tools of the trade directly from your favorite artists in your preferred genre and/or DAW, and many of these masterclasses come with guaranteed feedback from Armada Music’s A&R team on a demo of your choosing.